Growing Local Business Since 2013
If one of your new year' resolutions was to be more productive and organized on your work place, we might have a few hacks for you. In the next article we will show you how to customize your Gmail account to serve you the best.
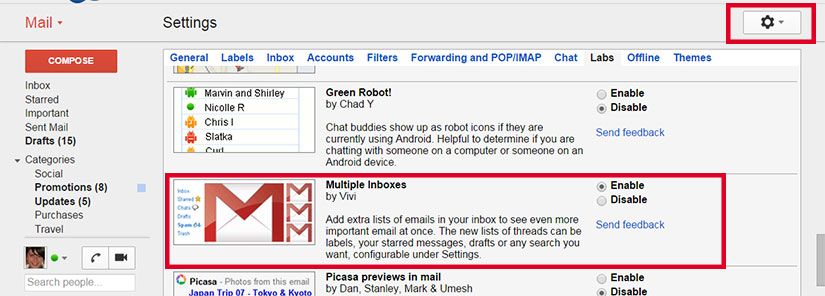
How many tabs have you got open in this moment on your browser? How about getting rid of all the other apps like Yahoo, Hotmail, even Outlook, and have all your emails sent to your Gmail Account.
If you want to enable this feature
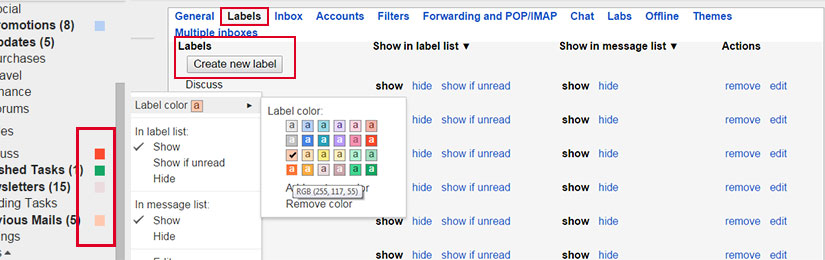
Now that you have a full inbox of unread messages, imagine how convenient it would be if you could make collections of email messages that are related to each other automatically. For example you might want to label emails that are coming from your different email accounts, or divide your emails into "Finished" and "Pending" labels...
If you want to make your inbox colorful and organized follow the simple steps below. In the next section we will show you how to automate your email labeling for improved efficiency.
The Gmail Filter feature gives you the options to filter your incoming email messages into different categories, labels or folders. You can sent an auto-reply, mark them as read and even delete them right away. There are thousands of possibilities that you can create with filters. Learning how to use filters properly in gmail will greatly increase your productivity and workflow.
Setting up a filter for your incoming email messages can be done in a few easy steps:
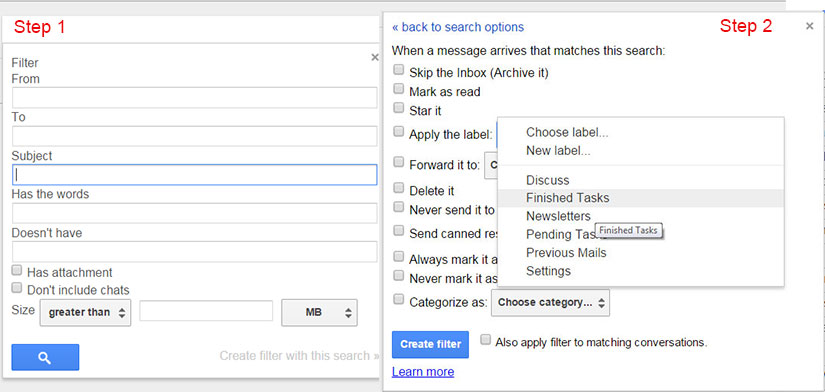
Alternatively, you can create filters directly from your inbox by selecting the message(s) that you want to apply a filter too and choosing "Filter messages like these" from the More drop down menu. Once selected follow steps 1 & 2 above to complete creation of your filter.
Prefer a video version of the instructions? Watch the video below.
Toll-free: 1-866-266-1669
Local: 780-266-6663
Mon-Fri: 8:30 AM to 5:00 PM
Sat-Sun: Closed | Holidays: Closed
60 Westridge Road NW Edmonton, Alberta, T5T 1B4
Looking for marketing services or web development? Send us a message and we will return your inquiry as soon as possible (usually within a business day).
We excel at lead generation & management.
Boost your leads, boost your sales. That has always been our goal; to live up to our name.
Edmonton AB, | PH: 780-266-6663